Make a space for each client
Give each client their own place for their people, bots, conversations and work.
A guided setup
Start with the client's name. Syl shows the next step when it matters, including exactly what to copy to your website provider.
How it works
Start with a name and a website address you control. Add a logo when you're ready. You'll verify the email address clients see before inviting them. Google and Slack only need setup if you offer those connections.
Give each client their own place for their people, bots, conversations and work.
In Your brand, choose the name, logo, color and support address clients will see.
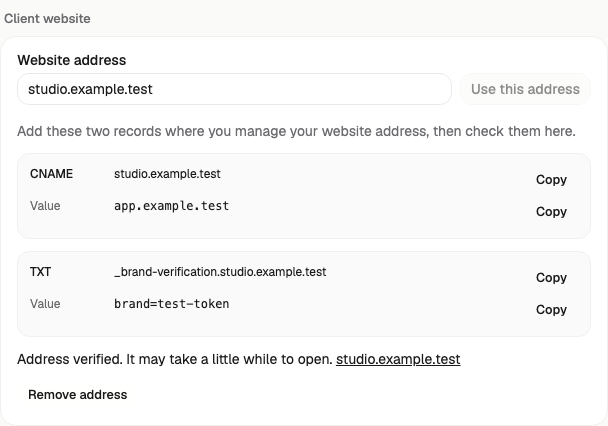
Choose an address, such as app.yourclient.com. Syl shows two lines to copy into the account where you manage that address, then checks them for you.
Choose the sender clients should recognize. Copy the lines Syl shows into the account where you manage the part after @ in that email address, then check them before inviting clients.
If clients use Google or Slack, set up your own apps there and copy their details into Syl. This step is only needed for the apps you offer.
Create a private link for their email address and share it. They sign in on their branded website and enter only their space.
Who covers the running costs?
Syl covers low-volume branded account and task emails within Agency pricing.
For AI, use an existing provider or add Pay as you go credit. AppSumo Agency customers bring a key for their bots' computers and, if they switch on Advanced memory, a memory key too.
Clients are invited to their own space. Your agency manages the plan and any extra client spaces.
Talk through your setup